Tuesday, September 21, 2010

Bonus Recipe: Failcake


Sometimes, there are shortcuts in life that can really help you out. A couple that come to mind are buying pre-made pesto, or finding the secret tunnel through the mountain in Koopa Troopa Beach for MarioKart 64.

Other times, however, shortcuts are just not the answer.


My sorority friend Betsy (the one with whom I made Herb Roasted Cornish Game Hens) and I attempted to bake a chocolate cake for dessert. Despite following a recipe exactly from a Better Homes and Gardens cookbook, the cake ended up more of a dried out chocolate graham cracker than a cake.

Needless to say, we slathered it with frosting and ate it anyways.

The next time she came over, Betsy had a delightful shortcut idea she had heard for making an easy chocolate cake: simply combining a box of cake mix with a can of Diet Coke.

What we envisioned would happen:


What actually happened:


The cake wasn't HORRIBLE. It was just way too rich and the texture was sorta weird and crumbly, but also mysteriously gummy. It was like a first grader had dropped Mommy's cake and then attempted to put the pieces back together with some glue stick.

Plus we only had a third of a container of frosting left in the fridge, so we couldn't even cover up our mess.

Ladies and gentlemen, I give you Failcake.

Ingredients:
  • 1 box cake mix. Ours was Devil's food, which led to an even weirder tasting cake.
  • 1 can Diet Coke. I am sure regular Coke would "work" as well, but we are watching our figures, after all.
  • 1/3 container frosting. Just enough to spread over your crumbly mess of a cake to cover with the word "FAIL" in M&Ms.
  • Enough M&Ms to spell out the word "FAIL"
Enjoy! Or...don't.


Directions:

1) Combine cake mix with a can of Diet Coke. Bake according to directions on the box.

2) Flip the cake onto a serving plate, spraying chocolate crumbs all over your counter as you do so, and pray the entire cake doesn't fall apart in transit.

3) Use your week-old leftover frosting to attempt to cover up your Failcake. Fail to do so. Cover with M&Ms so it says FAIL, as if you had any doubt as to the status of failure or success of your cake.

4) Resign yourself to said failure, drink some wine, watch some bad TV, and eat Failcake anyways.


Monday, September 20, 2010

Herb Roasted Cornish Game Hens and Vegetables


When you think about it, everything is cuter when it is in miniature. Doll houses, teacup puppies, babies....everything is better when it's tiny. Well, almost everything.


If you have never tried them, Cornish game hens are basically miniature chickens. A single Cornish hen makes the perfect elegant individual dinner portion. They are very inexpensive, easy to make, and an impressive please-your-man kind of dish.

Instead of pleasing my man with this dish, I invited over my sorority sister Betsy to teach her how to make the hens. Hilarity ensued.

"If they're called Cornish game hens, where are they from? Corn?"


Anyways, the next time you feel like throwing together something a lil extra fancy (yet still super easy), give these babies a try!


Ingredients:
  • 2 Cornish game hens. They usually sell these in a frozen two-pack at the grocery store. Make sure to give them at least a day or two to thaw in the fridge!
  • 2 large carrots
  • 3 stalks of celery
  • 2 onions
  • 5-6 small red potatoes
  • 1 cup white wine
  • 1 can chicken broth
  • 1/2 cup olive oil
  • 1 tbsp. minced garlic
  • 1 tbsp. dried rosemary
  • 1 tbsp. dried sage
  • 2 tbsp. fresh thyme leaves. Or you can use 1 tbsp. dried thyme.
  • Salt and garlic pepper
Feel free to add more or less vegetables; you basically just need enough to create a nice bed for the hens. Also, feel free to substitute any other herbs you may have on hand. Well, maybe not ANY other herbs.... ;)


Directions:

Preheat your oven to 350 degrees. Cut up your vegetables into bite sized chunks of equal size and throw them into a roasting pan (or large baking dish if you don't have one. You could also buy a foil roasting pan to throw away after for easy clean-up!)

Save a few chunks of the onion and set them aside.


In a bowl, whisk together your olive oil, garlic, rosemary, sage, and thyme.


Now it's time to get down to the business...put on some sexy Marvin Gaye music and lay down your lovely hens on the bed of vegetables, breast side up. Now massage them tenderly with the delicious herb and olive oil mixture you just made, making sure to work it into every nook and cranny....don't be afraid to get messy and show those ladies some love. We named ours Henrietta and the Duchess of Cornwall.

Oh, and then stick the leftover onion chunks up their butt. You can cut the Marvin Gaye music here, cause there ain't nothin' sexy about that.

Sprinkle the hens and veggies with salt and garlic pepper to taste, and pour the wine and chicken broth into the pan.


Pop the hens in the oven for 45 minutes, and then raise the heat to 400 for 15 minutes to get them nice and beautifully browned. You will know they are done when the legs move freely in their sockets and the juices run clean when you stick a fork or knife into the thickest part of the thigh.


Let the hens rest for about 10 minutes so the juices get absorbed back into the meat and they stay nice and moist (sorry for those of you who hate the word "moist".) Then spoon the veggies onto a serving platter and lay the hens on top. Gawgeous!


Optional: If you want, you can create a super flavorful and simple gravy by pouring the pan juices into a small saucepan. Whisk in about a tablespoon of flour and let the mixture simmer over medium high until it's nice and thick. Pour through a strainer to remove any lumps. Enjoy!


Thursday, September 9, 2010

Spinach and Artichoke Lasagna


So I have finally established I will most likely be leaving Durham at the beginning of October. The whole partially-employed-creepy-alumna-who-still-occasionally-haunts-the-campus thing has started to get old, and I am ready for the next adventure.

In the meanwhile, I am now playing a game I like to call: Eat All the $@#% Left in Your Pantry and Freezer! Today's contestants include a box of frozen spinach and a can of artichoke hearts.

Normally I kinda despise artichokes. The only time I even remotely like them is in spinach and artichoke dip, so that was my first thought. My second thought was what would happen if I sat on the couch and ate an entire batch of spinach and artichoke dip by myself.


So instead I made Spinach and Artichoke Lasagna! For some inexplicable reason that seemed healthier to me, even though it took me days to take down this beast. I did freeze some portions for later though.

Anyways, this is a great vegetarian alternative to my more classic Mountain Lasagna. It was quite tasty, and can feed a crowd. Or yourself over the span of a week. Either way, give it a try!


Ingredients:
  • 9 uncooked lasagna noodles. Wanna know a secret? YOU DON'T HAVE TO BOIL LASAGNA NOODLES. When they bake in the sauce, they soften right up. Ignore those instructions on the back of the box! Rebel!
  • 2 eggs
  • 1 large container ricotta cheese
  • 3 cups shredded mozzarella cheese
  • 1 cup crumbled feta cheese
  • 1 onion
  • 1 can quartered artichoke hearts, drained
  • 1 box frozen spinach, thawed. Make sure to squeeze out all the excess moisture. You would not believe how much water comes out of the thawed spinach!
  • 2 tbsp. minced garlic
  • 1 can vegetable broth
  • 1 cup tomato sauce
  • 2 tbsp. Italian seasoning, divided
  • 1 tbsp. dried rosemary. Yeah, there is probably rosemary in the Italian seasoning. But it never hurts to add extra if you have it on hand.
  • Olive oil
Okay, so I know this ingredient list looks a little long. But you probably have a lot of this stuff anyways, and if not, it's all cheap and easy to find, like a hooker in Las Vegas.


Directions:

Preheat oven to 350 degrees. Crack your eggs into a bowl and lightly beat them into submission.


Mix in your ricotta cheese, half of your mozzarella cheese, and 1 tbsp. Italian seasoning.


Chop up an onion and put it in a large, high-sided skillet with some olive oil at medium high heat. When it has become soft and translucent, add the garlic.


After the garlic has cooked for about a minute, add your vegetable broth, rosemary, and remaining Italian seasoning to the skillet. Let it come up to a boil.


In the meanwhile, roughly chop your artichoke hearts. Play Bon Jovi's "Shot Through the Heart" in the background.


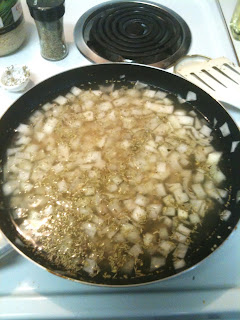
Once the skillet has come to a boil, add your artichoke hearts, spinach, and tomato sauce. As you can see from my photo, my skillet was too small for comfort. Don't make the same mistake I did: use a big ole skillet or pot!


Let the mixture simmer and reduce for about ten minutes at medium heat. Spray a 13 x 9 baking dish (or foil pan for easy clean up) with nonstick spray and ladle in a thin layer of your sauce to coat the bottom of the dish.


Add three lasagna noodles.


Add about half your cheese mixture.


Add another layer of sauce, noodles, and the rest of the cheese mixture. Then a layer of sauce, the last three noodles, and sauce again. Top the whole thing with the rest of your mozzarella cheese and feta crumbles.


Cover it up with foil and pop it in the oven for 45 minutes. You probably want to stick a cookie sheet under it in case the sauce boils over!

While you are waiting, you can stare at this random picture I found online of Borat with his head as an artichoke:


Then uncover your lasagna and let it bake for another 15 minutes until the cheese on top is all hot 'n bubbly.


Cut yourself a big ole messy portion and dig in! It is messy and delicious.


Monday, September 6, 2010

Turkey and Two Bean Chili


It's that time again folks: FOOTBALL SEASON HAS BEGUN!!

At Duke University, however, football season is less about the football and more about the crazy costumed, out of control boozefest beforehand known as Tailgate (with a capital T).


Of course, I am now too old for such childish things (until Homecoming Weekend! Wooo COLLEGE!!!) Instead, it's fun to just have some friends over for some great food, a couple of beers, and a good ole football game to watch on TV. Football and food go hand in hand!


My Turkey and Two Bean Chili is unbelievably hearty, delicious, and easy to make. It's the perfect low maintenance main dish for a sports event or potluck, or just for a cozy night in by yourself. Enjoy!


Ingredients:
  • 1 package lean ground turkey. Usually about 1.3 lbs. You are welcome to use ground beef if you'd like, but the turkey has 1/3 of the calories and is way less greasy.
  • 1 onion
  • 2 tbsp. minced garlic
  • 1 can black beans, drained and rinsed. Get rid of all the salty gloop that comes in the can.
  • 1 can kidney beans, drained and rinsed. More beans! The magical fruit!
  • 1 cup frozen corn kernels. No need to thaw.
  • 2 cups tomato sauce. I honestly have no idea how much I put in. Just eyeball it based on how thick you like your chili.
  • 1 packet chili seasoning. This is the lazy, poor man's way to make chili. But seriously, the flavors are excellent and it makes your life way easier. I buy the mild kind cause I am a pansy.
  • Sour cream, cheese, green onion, etc. Pick the toppings of your choice!
Considering how hearty this chili is, it's surprisingly healthy for you. Like I said, you can substitute beef, but I have never missed it in this flavor-packed recipe. FYI, this makes quite a bit of chili, but it freezes great.

I make this in the slow cooker cause the flavors simmer and bump and grind all day, but you can also just make it in a pot if you want. Remember kids: pot is always an option. :-/


Directions:

Chop up your onion. (Don't all my recipes seem to start this way?)


Heat a bit of oil in a skillet over medium high and add your onion. Let it sweat for a couple minutes (grrr! football! manly! sweat!) to become soft and translucent.


Add your garlic and ground turkey to the skillet. Stir to mix the garlic and onion into the meat and break it up into small crumbles as it cooks.


Once the turkey is browned and there is no pink left (takes about 5-7 mins. or so), spoon it into your slow cooker. Add your drained, rinsed cans of beans and toss to combine.


Now mix in your frozen corn kernels, tomato sauce, and seasoning packet. You can adjust how much sauce you want in your chili...some like it chunkier than others (that's what she said?)


Cover the slow cooker and let it cook on low for 6-8 hours. Since the meat is already cooked all the way through, you can do it for less time than this if you need to have dinner ready sooner. It's up to you!

Your house will fill with the smell of meat and football (in a good way.) Spoon the chili into a bowl, add your favorite toppings, and dig in!


Thursday, September 2, 2010

Chinese Beef with Broccoli


There are few worse things than having a supreme craving for Chinese food, calling in a take-out order, going to pick it up, and taking a bite, only to find a gloopy, salty mess of unidentifiable meat and soggy vegetables.

When Chinese food is good, it's amazing. When it's bad, IT'S HORRIBLE!! Stop settling, my friends.


Chinese food is quick, easy, and inexpensive to make on your own. Below is my recipe for a classic Chinese Beef with Broccoli, done the Cooking for One way.

What is the Cooking for One way, you may ask? It's coming home from work, ravenous, knowing you don't have a lot of food on hand, but you want Chinese food and you want it now, dammit! I'll show you how.


Ingredients:
  • 1 package (about 3/4 lb) boneless, thin beef. Mine specifically said "Perfect for Stir-Fry!" I believe it was beef eye of round, already sliced thin to make my life easier.
  • 1 bunch of broccoli. Frozen florets would work great as well.
  • 1/2 package button mushrooms
  • 1 can sliced water chestnuts, drained
  • 1 tbsp. minced garlic
  • 1 tbsp. minced ginger. I use the kind in the tube from the grocery store. It keeps in your fridge FOREVER. Well, at least for several months.
  • 1/4 cup flour
  • 1 tbsp. garlic powder
  • 2 tbsp. sesame oil
Sauce:
  • 1/4 cup flour
  • 1 can beef broth
  • 1.5 tbsp. brown sugar
  • 2 tbsp. soy sauce
That's it! It really only takes about fifteen minutes to make. Most of this stuff you probably already have in your fridge/freezer/pantry/under your bed, and you can feel free to add or subtract veggies at will. This recipe also makes enough to have delicious leftovers for lunch the next day**


**Read: drunkenly later that night.


Directions:

Chop up your mushrooms and broccoli (if using fresh instead of frozen florets.) Then slice up your beef into strips against the grain.

What does this mean? Look at your meat and see which direction the fibers are running. Cut perpendicular to that direction (also known as the Lorena Bobbitt cut). This will help ensure your meat is nice and tender!


Put your beef strips in a Ziploc bag with the 1/4 cup of flour and 1 tbsp. garlic powder, and CLOSE THE BAG. Give it a nice shake to coat.


In a small bowl, whisk together your sauce ingredients.


Heat your sesame oil to medium high in a skillet. Once it's nice and hot, add your beef.


Let it brown for a couple minutes, and then flip the pieces over.


Once the other side is brown after a minute or so, take out the beef and put it on a separate plate. Don't overcook it or it will get tough! It should be nice and seared on the outside, but still pink and juicy in the middle.


Add your minced garlic, ginger, broccoli, and mushrooms to the skillet. Toss to combine.


After the veggies have heated through (broccoli tender-crisp, mushrooms soft and brown), add your sauce and water chestnuts to the skillet. Let the mixture get nice and thick and bubbly for a few minutes.


When the flour has thickened up your sauce so it coats the back of a spoon, add your beef back to the skillet to warm through and soak up the deliciousness.


Make some quick rice or noodles to go along with it, pour into a bowl, and enjoy your hot tasty Chinese food!