Saturday, December 25, 2010

Perfectly Fluffy Matzo Ball Soup: Hannukah Part Three


Now that it's Christmas, I think it's finally high time for me to wrap up my Hannukah series. And what better way to stick it to the man (and by the man I mean Santa) than to post a matzo ball soup recipe on Christmas?

Ha ha, score one for Hannukah Harry!


If you have never had real matzo ball soup before, you are missing out. For the goyim out there, matzo balls are fluffy, delicious dumplings made from matzo meal. Known as the Jewish penicillin, this hearty, warming soup will cure whatever ails you. Especially if what ails you is being a Jew on Christmas.

Enjoy!


Ingredients:
  • 3 large boxes chicken broth. If you have the time to make your own chicken broth, obviously that's always going to be better than store bought. But if you don't have a chicken carcass to boil, this will do just fine, especially when simmered with fresh vegetables.
  • 1 large carrot
  • 2 celery stalks
  • 1 medium onion
  • 1/3 cup chopped fresh Italian parsley. Some for the balls and some for the soup.
  • 1 cup matzo meal
  • 4 eggs
  • 1/4 cup chicken broth. Just take this from your pot of broth once it is simmering.
  • 1/4 cup vegetable oil. If you happened to make your chicken broth from scratch, 1/4 cup of the rendered chicken fat works here, too. But rendered chicken fat sounds kinda gross.
This recipe yields about 10 matzo balls and tons of soup. Feel free to adjust the quantities depending whether you are making the soup for a family get together, or just to treat yourself to some comfort food!


Directions:

Peel and chop your carrot, onion, and celery (though you don't have to peel the celery, obviously) into nice, small, evenly sized pieces. If the idea of this makes you want to claw your eyes out, feel free to substitute frozen mirepoix (bag of cut up carrots, celery, and onion). I won't judge.


Add a drizzle of vegetable oil to a large pot set to medium high heat. Stir in your vegetables and cook until they are softened, about two minutes.


Pour in your chicken broth and add about half the chopped parsley. Let it come up to a boil, and then turn the heat down to low to let it simmer.


Now it's time to get the action going with your balls (yes, yes, that's what she said). I am going to let you choose your own matzo ball adventure here based on personal preference:

A) If you like denser matzo balls, skip the next step and simply beat your eggs whole into the matzo mixture.

B) If you think denser matzo balls taste like hockey pucks and you like yours nice and fluffy, proceed with my given recipe.

Choose wisely!

Personally, I think separating your eggs is the single greatest trick for perfectly fluffy matzo balls. If you agree, go ahead and separate your egg yolks and whites using your method of choice. I like just cracking the egg in two and passing the yolk back and forth between shells, letting the whites drip down into the bowl. If this is scary to you, you can just crack the eggs into a strainer or colander and let the whites drip through into a large bowl.

Below is a picture of someone else's fingers:


Put the yolks in a bowl with the matzo meal, vegetable oil, remaining parsley, and 1/4 cup of your simmering chicken stock and whisk to combine.

Now it's time to beat your egg whites. This is how souffles are made so nice and fluffy: beaten egg whites are folded into the batter and the air gives it lift. Make sure your bowl is large enough, cause that pile of slimy egg whites is going to magically transform into a fluffy cloud of delight.

With a hand mixer, beat the egg whites on low until they are frothy but not stiff. What the hell does that mean? The whites should look like beer foam.


With a spatula, fold the egg whites gently into the matzo meal mixture. They should be nice and combined, but not overmixed cause that will deflate the egg whites.


Pop the mixture into the fridge for at least 15 minutes, but longer is fine too if you are making this ahead of time.

With an ice cream scoop or large spoon, scoop out equal size lumps of batter, roll them in your hands a bit to smooth them out, and drop them into the simmering chicken broth.


Cover the pot and let the matzo balls cook for about 40 minutes, turning them over halfway through to let the other side cook.

Spoon the balls into a bowl and pour in the chicken broth and veggies. Enjoy your delicious homemade matzo ball soup!


NOTE:
I will be off on an adventure in Argentina and Uruguay for the next couple weeks, so there will be a brief blog hiatus. I will be eating lots and lots of beef and drinking lots and lots of wine. Hasta luego, my friends!

Wednesday, December 22, 2010

Vadim's Kugel with Streusel Topping: Hannukah Part Two


You may be asking yourself a couple questions: Who is Vadim? And what is kugel?

Vadim Sagalchik is a high school friend of mine and the lucky winner of my awesome (albeit half-assed) Facebook contest to see who would be my 30th official follower on the blog!

His grand prize is a recipe that will forever be named after him, as well as a guest appearance on Cooking for One. Say hi, Vadim.


As for the second question, kugel is a sweet Jewish noodle dish. I have never really understood whether it is a side dish or dessert. Either way, it's delicious and super easy to make.

Though I wish I could give Vadim and his Belarusian heritage credit for this kugel recipe, I'm afraid it's gonna have to go to Emeril Lagasse, of all people. For some reason the guy has tons of Jewish food recipes on Food Network's website. Weird!

Artist's interpretation:


Anyways, kugel is fantastic. Enjoy!


Ingredients:
  • 1 lb. wide egg noodles. You can use Manischewitz brand like I did to put you in a Jewy mood.
  • 5 eggs
  • 4 tbsp. butter. Emeril could give Paula Deen a run for her money.
  • 1 lb. cottage cheese
  • 2 cups sour cream
  • 1 cup milk. COULD THERE BE ANY MORE DAIRY PRODUCTS IN THIS RECIPE?!
  • 1/2 cup sugar
  • 2 tsp. vanilla extract
  • 1 big ole handful golden raisins. This is not in Emeril's recipe, but I love kugel with raisins in it! Plus this addition makes me feel less like a loser for putting someone else's recipe on my blog.
Topping:
  • 1 cup light brown sugar
  • 2 cups pecan pieces
  • 1 tsp. cinnamon
Traditional Jewish kugel does not have the streusel topping and you can leave it off if you like, but I think it adds beautiful color and flavor.


Directions:

Preheat the oven to 350. Put a big pot of water on the stove to bring up to a boil and beat your eggs in a large bowl.


Whisk in your cottage cheese, sour cream, milk, sugar, vanilla, and raisins. In a separate small bowl, mix together your streusel topping: brown sugar, pecans, and cinnamon.


Once your water is boiling, add your egg noodles and cook according to the directions on the bag or box. I would recommend draining the pasta a minute or two before it is completely cooked cause it will cook more in the oven too.

When the noodles are ready, drain them and add them back into the pot. Stir in your butter and let it melt into the noodles. Resist the urge to forget the kugel and simply eat the buttered noodles. Resist!


Once the noodles have cooled down a bit, stir in your dairy mixture.


Butter a 9 X 13 baking dish and spread the noodles into it in an even layer. Sprinkle the streusel topping over it.

Bake in the oven for about an hour or until the whole mixture is set like a custard. The recipe called for an hour, but mine actually took more like an hour and a half, so maybe it depends on your oven? Or maybe my handful of raisins added an extra half hour of cooking time? I don't understand these things.


Spoon a big helping onto your plate and enjoy hot or at room temperature as a side dish or dessert. Choose your own kugel adventure!


Do YOU eat kugel as a side dish or a dessert?

Monday, December 13, 2010

Braised Brisket with Vegetables: Hannukah Part One


As this blog continues through a time warp, taking you back to holidays that ended weeks ago, I now bring you my three part Hannukah series!

Hannukah is the time of year when Jews gather to celebrate an obscure historic event that happens to miraculously coincide with the month of that Christian fun-fest known as Christmas. While Christmas may beat Hannukah when it comes to decorations, songs on the radio, and general fanfare, I would still take Hannukah food over Christmas food any day.

I mean really. Turkey? You just had that for Thanksgiving. Ham? No Jew in their right mind would eat that.


Good ole beef brisket is a traditional choice for a delicious Jewish holiday dinner. As long as it is handled properly, this big hunk of meat becomes fork tender, juicy, and a perfect hearty main course.

Brisket Tips:
  • If you are going to sear the brisket first (recommended) let it sit out til it comes to room temperature first. Don't worry, you won't get E.Coli. And it will sear much more effectively.
  • Pretty much the longer you cook it, the better (within reason, of course!) It is great in a slow cooker, but the one I have wasn't big enough.
  • If you can, make the brisket the day before you plan to serve it. It really is one of those dishes that tastes even better the next day. Plus, if you refrigerate it overnight, skimming the excess fat off the top of the sauce is a piece of cake. To make ahead, just slice up the meat, pack it up in the fridge, and reheat in the oven before serving.
  • Always slice the brisket against the grain. That means take a look at which way the lines of meat run and cut perpendicular to them. This will make each bite of meat easier to chew.

Though my Braised Brisket with Vegetables requires a long cooking time to achieve that tenderness, you can just leave it in the oven all afternoon and go about your dreidel-spinning activities. Enjoy!


Ingredients:
  • 3-4 lb. beef brisket. Preferrably labeled "first cut." I don't know why that's supposed to be better, but that's what Food Network tells me. Brisket is relatively quite inexpensive (spare me a Jewish joke, here).
  • 28 oz. can crushed tomatoes
  • 1 can beef broth
  • 1/2 bottle red wine
  • 2 bay leaves
  • 2 tbsp. dried thyme. You can also use fresh if you have it.
  • 2 tbsp. dried rosemary. See above.
  • 2 tbsp. minced garlic
  • 1 onion
  • 2 carrots
  • 2 stalks of celery
  • 5 red potatoes
  • Salt 'n pepa
  • Olive oil
My brother enjoyed the sauce so much he was practically drinking it. Whether that reflects more on the quality of the sauce or my brother's table manners remains to be seen.


Directions:

Preheat oven to 350 degrees. Prepare your veggies: peel and chop your onion and carrots into large chunks, cut your celery into large chunks, and halve your potatoes. They should all end up approximately the same size.

Throw em in the bottom of a big ole roasting pan.


Now comes an optional step: searing the brisket. It adds beautiful color and extra flavor to the dish, but honestly, you are cooking the thing so long that the flavor difference is going to be minimal.

If you have the time and inclination to sear it, just heat some olive oil in a big ass skillet over medium high, sprinkle the brisket with salt n' pepa and put it in the skillet to develop a nice browned crust on both sides. (As you can tell, I probably should have let mine sear even longer.) When it is done, lay it on your bed of vegetables in the roasting pan.


Pour the beef broth into the searing pan to help scrape up any burned bits of meat stuck to the pan. This will help add nice flavor to your sauce. Then, pour in your crushed tomatoes, garlic, rosemary, and thyme. Let it simmer for a few minutes.


Pour the sauce over the meat and vegetables. Don't think I forgot about the wine! Pour it into the pan until all the liquid comes about 3/4 of the way up the meat. Stir the liquid a bit so the wine gets mixed into the tomato sauce, and throw in your two bay leaves.


Cover the roasting pan with foil and bake for at least 3 hours (ours took about 4 hours). At that point, you can start checking on the meat. Feel free to baste it with the sauce or even flip it over if the top is looking dry. You will know it is done when the meat easily falls apart with a fork. The longer you can cook it, the better.

Put the brisket on a cutting board, cover it in foil, and let it rest for about 15 minutes. In the meanwhile, you can put the vegetables in a serving bowl and pour the sauce from the pan into a gravy boat.

Slice the brisket thinly against the grain and serve with the sauce and vegetables.


Pour out the rest of your bottle of wine and enjoy. L'Chaim!

Thursday, December 9, 2010

Chocolate Pecan Pie: Thanksgiving Part Three


You thought Thanksgiving ended two weeks ago? YOU THOUGHT WRONG.

My lack of consistent blogging means we can still celebrate Thanksgiving weeks after the fact! I have saved the best for last: Chocolate Pecan Pie.

Since I do not in any way claim to be a baker, I rely on store bought pie crust and stick tightly to recipes when I make dessert. Sorry folks, all you are going to get today is an adapted Paula Deen recipe. But hey, that woman knows her desserts!


For those of you who don't know her, Paula Deen is a spray tanned, butter loving, random item sponsoring, y'all spouting, good ole Southern woman with a few shows on the Food Network. When my parents requested chocolate pecan pie for Thanksgiving, I knew she was just the woman to turn to.

Enjoy!


Ingredients:
  • 9-inch unbaked frozen pie crust. You can buy these at the grocery store. They come in their own pan so you don't even have to wash a pie plate! It saves you the tricky work of making and rolling a crust from scratch, and they taste great.
  • 2 cups pecan halves. Can't have a pecan pie without 'em.
  • 3 eggs
  • 4 tbsp. melted butter. Oh yeahhh!
  • 1/2 cup dark corn syrup
  • 1 cup sugar. I used Splenda to cut some calories. Which is kinda like ordering a Diet Coke with a Big Mac and large fries.
  • 1/2 package semi-sweet chocolate chips
The one thing I am regrettably missing from Paula's recipe is 2 tbsp. bourbon. As much as I love booze, my parents were paying for the grocery bill and I didn't think I could convince them I needed a handle of bourbon to make a pie. C'est la vie.


Directions:

Preheat oven to 375 degrees and lay your pecan halves on your crust in an even layer. No need to thaw the frozen crust.


In a small bowl, beat your eggs and whisk in the melted butter, corn syrup, sugar, and chocolate chips.

NOTE: If you leave the chips whole, they will melt deliciously as the pie bakes, but the pie surface will look more like a chocolate chip cookie. If you want, you can melt the chocolate chips and whisk the melted chocolate into the mixture instead for a more uniform look.


Place your pie crust on a baking sheet covered in foil (for easy clean up) and pour your mixture over the pecan halves.


Bake for 10 minutes, then lower the heat to 350 degrees and bake for another 22-25 mins. until the pie is set. Take it out and let it cool (on a windowsill if you are feeling nostalgic) before slicing.


Cut yourself a big chocolatey wedge and dig in, y'all!


What do YOU say? Pee-can, or pi-cahn? This has been the source of a Chudwin family debate and needs to be settled once and for all....

Friday, December 3, 2010

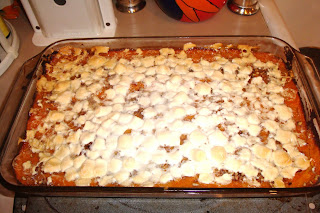
Sweet Potato Casserole with Marshmallow Topping: Thanksgiving Part Two


Here is a riddle for you: when is a vegetable not a vegetable?

Answer: when it is whipped up with eggs and cream and sugar and spices and slathered with maple syrup and marshmallows!

This recipe, my friends, is a vegetable in dessert's clothing. After all, pretty much everything in life is a little bit better when it is overrun with marshmallows.... s'mores.... hot chocolate.... whole cities.....


Okay, maybe not cities. But definitely my Sweet Potato Casserole with Marshmallow Topping. This dish reeks of delicious fall flavors and is the perfect holiday side dish.

Sorry, broccoli, there is a new "vegetable" in town.


Ingredients:
  • 5 large sweet potatoes. Pretty much the only redeeming nutritional aspect of this recipe. If you are lazy and/or strapped for time, I suppose you could also use canned sweet potatoes, but I make no guarantees since I haven't tried it this way.
  • 2 eggs
  • 1/3 cup heavy cream. Loosen up that belt, it's the holidays!
  • 2 tbsp. maple syrup, plus more to drizzle. I mean actual maple syrup, not that nasty Aunt Jemima pancake high fructose corn syrup bullshit.
  • 1 tsp. vanilla extract. If you don't have it, don't worry about it. But it is a fantastic flavor addition.
  • 1/2 cup brown sugar
  • 1/2 tsp. cinnamon
  • 1/4 tsp. nutmeg
Topping:
  • 1 big ole handful chopped pecan pieces. I bought the kind in a bag called "pecan chips" and they were perfect for the topping.
  • 1/2 package mini marshmallows. Say hello to your old friend Jet-Puffed.
One of the best parts about this dish is that it is easy to make ahead of time, which is crucial if you are trying to make an epic Thanksgiving feast like I did.

Just make the casserole minus the topping and pop it in the fridge overnight. Let it come up to room temperature the next day, add the topping, and bake as directed below. Enjoy!


Directions:

If you are making this the same day you plan to serve it, preheat the oven to 350 degrees. If not, see above.

By far the worst part of making this dish is the peeling and chopping of the sweet potatoes. Peeling is time consuming, and you practically need an effing machete to cut through the raw potatoes. Like this guy.


If you have relatives around for the holidays, try to rope them into doing this part. Peel the sweet potatoes and cut them into large chunks.


Put the potatoes in a pot with just enough cold water to cover them and turn the heat to high. Let the potatoes boil away until they are tender enough to easily pierce with a fork, which should take about fifteen minutes or so.


Drain the potatoes and put them in a large mixing bowl. Mash them up with a potato masher (you can buy this at the grocery store and it will make this super easy). Add your cream, eggs, syrup, brown sugar, cinnamon, and nutmeg.


You may finish mashing with the potato masher, but if you want a nice smooth casserole, YOU MUST WHIP IT. WHIP IT GOOD. (With a hand mixer). (Preferrably with Devo playing in the background).


Now whip it!
Into shape!
Shape it up!
Get straight!
Go forward!
Move ahead!
Try to detect it!
It's not too late!
To whip it!
Whip it good!


Anyways. Go ahead and spread your mixture into a 9X13 baking dish. If you are making this the day ahead, let it cool down, wrap it up, and stick it in the fridge. Otherwise, proceed to the next step. See? This recipe is like a choose-your-own-adventure!


Drizzle the top of the casserole with a bit more maple syrup. Sprinkle your handful of pecan pieces in an even layer. Then add your mini marshmallows.


Put the casserole in the oven for about 30 minutes or until it is hot and bubbly and the marshmallows are all melted and toasty brown. Your kitchen will smell like fat person heaven. Spoon onto a plate and dig in!


What are some of YOUR favorite holiday side dishes posing as vegetables?

Tuesday, November 30, 2010

Roasted Turkey Roulade with Cranberry Pecan Stuffing: Thanksgiving Part One


For people who love to eat (*cough* myself *cough*) there is no greater holiday than Thanksgiving. Although I pride myself, and this blog, on presenting simple yet delicious recipes for the amateur cook, I needed to step things up for this epic holiday of food. Thus, my Roasted Turkey Roulade with Cranberry Pecan Stuffing.

But Stacy, why not just roast up a regular bird and call it a day? Well, it turns out that this is much easier in many ways and better suited to my family.

Here is why (imagine me saying this in a cheesy salesperson voice):

Do you tend to skip the dark meat and head straight for the breast? Do you hate waiting four hours for an entire turkey to roast? Do you struggle year after year to carve that giant bird, and then have to deal with all those bones? Then this turkey roulade is for you!


It's just a boneless turkey breast butterflied (cut open like a book) and pounded flat, rolled up with stuffing in the middle so when you slice it, each piece contains a spiral of stuffing. It makes for a gorgeous presentation, and the best part is your butcher will butterfly and pound the breast for you, free of charge!

This sounds tricky, but it really isn't. Roulade is just French for "roll that $#@% up!"

For comparison sake (and a good laugh), check out the ridiculous video below:


Ingredients:

Turkey:
  • 3 lb. skin on, boneless turkey breast. This is enough meat for at least four people. I called the butcher at the grocery store ahead of time to order this and requested that it be butterflied and pounded flat. Why do the work when they will do it for free? (sez the Jew on Thanksgiving)
  • 6 tbsp butter. You heard me.
  • 2 tsp. dried thyme. You can use fresh if available, but double the amount.
  • 2 tsp. dried sage. See above.
  • 2 tsp. dried rosemary. See above.
  • Salt and pepper or garlic pepper to taste
Stuffing:
  • 1 onion. Peeled and chopped.
  • 1 can low sodium chicken broth. You will need one cup of it for the stuffing and the rest to pour in the roasting pan.
  • 1 big ole handful of Craisins. These dried cranberries are inexpensive and plump up beautifully when cooked with the turkey.
  • I big ole handful of chopped pecans
  • 2 cups Pepperidge Farm Herb Seasoned Stuffing. You can use another brand if you'd like or make your own from scratch, but this is just so much easier.
  • 2 tbsp. butter. Yup, more butter!
Vegetables: These are optional, but since you are using the pan and oven anyways, you might as well roast some vegetables along with the turkey for a simple side dish.
  • 5-6 red potatoes
  • Handful of baby carrots or two large peeled carrots
  • 2 stalks of celery
  • 1 onion
  • The rest of the can of chicken broth
  • Splash of white wine (optional)
Equipment:
  • Kitchen string. Available at the grocery store.
  • Basting brush. Not super necessary, but it makes it easier to paint the herb butter on the turkey.
  • Instant read meat thermometer. You can buy a cheap one at the grocery store, and it really is the only fail proof way to ensure you don't give your guests salmonella.
  • Large roasting pan. Ideally one with a roasting rack. If you don't have one, you can always buy a heavy duty foil roasting pan to throw away for easy clean-up.
This looks like a big scary list of ingredients, but it's really not. This is one of those dishes that looks super complicated and will trick your guests into thinking you are the long lost child of Martha Stewart, when really you will be more like the long lost child of Sandra Lee. In a good way.


Directions:

Take your turkey breast out of the fridge so it has time to come up to room temperature. Preheat your oven to 350 degrees.


Time to prepare the stuffing! Melt the 2 tbsp. of butter in a saucepan over medium high heat and add your chopped up onion.


When the onion has become softened and translucent after a couple minutes, remove the saucepan from the heat and add the stuffing mixture and cup of chicken broth. Stir to combine.


Cut up your vegetables in large, equally sized chunks (making sure to peel the onion and large carrots first) and put them in the bottom of your roasting pan. Put the rack on top of them and pour in the rest of your can of chicken broth and splash of wine. This will help keep everything nice and moist.


Season the turkey breast generously with salt and pepper. Spoon the stuffing onto the breast and spread it out in an even layer, leaving a border of about one inch on all sides. Add the handful pecans and handful of craisins.


Now for the roulade-ing. I promise, this is not difficult! Start at one end of the turkey breast and tightly roll it up like a sleeping bag with the stuffing inside.

With the seam side down and the skin side up, cut some pieces of kitchen string and tie them tightly around the turkey roll at intervals of every couple inches. Trim any excess string and lay the turkey roll on the roasting rack (seam side down, skin side up).


Now it's time for LOTS AND LOTS OF BUTTER, Y'ALL! Melt 6 tbsp. butter in the microwave or over the stove and add your herbs (thyme, sage, and rosemary). Using your basting brush or your hands, coat the turkey with about half of this butter mixture. Sprinkle the turkey and vegetables with some more salt and pepper.


Pop that baby in the oven! Check on the turkey after about 45 mins. and baste it with the rest of your herb butter. If the skin on top starts to get too brown, cover the pan loosely with a piece of foil.

A 3 lb. breast should take about 1.5 hours total, but the only way to know for sure is to stick your meat thermometer into the thickest part of the meat (that's what she said?) and make sure it has reached 165 degrees. At this point the turkey should be moist and perfect, the skin beautifully browned, and the vegetables tender.

Once the turkey is at 165 degrees, remove it from the pan and put it on a cutting board. Cover it with foil and let it rest for about fifteen minutes. It will stay nice and hot, and this is the best way to ensure the juices redistribute in the turkey and keep it from drying out.


While it's resting, this is the perfect time to make gravy. Remove the vegetables from the roasting pan with a slotted spoon and put them aside.

Pour the pan drippings into a small saucepan and whisk in a packet of turkey gravy mix or a couple tablespoons of flour, depending on how many drippings you have and how thick you like your gravy. Heat the mixture to a boil and then lower it to a simmer, whisking to remove any lumps. To be on the safe side, you can always pour it through a strainer into your serving vessel.

Flatter the man of the house (in this case my father) by asking him to carve the turkey. Have him cut off the string, slice up the roulade, and serve with the gravy and/or cranberry sauce.


This makes for a beautiful and delicious alternative to a big generic roasted turkey. Stay tuned for Thanksgiving side dishes and desserts!


What did YOU make for Thanksgiving this year??